


How to Draw Everyday Objects Step by Step

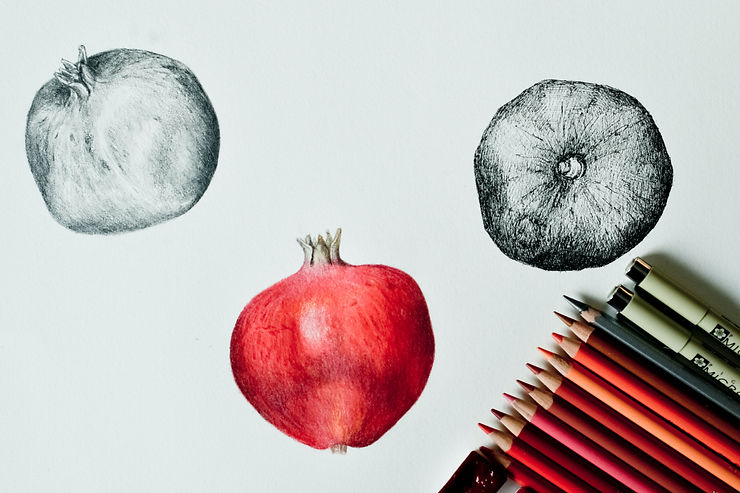
You don't need an elaborate subject to practice drawing. In fact, some of the best drawing practice can be found right in front of you. A coffee mug on the kitchen counter, a pair of headphones on your desk, a houseplant by the window, or a pair of shoes by the door can all become useful drawing subjects.
Drawing everyday objects teaches you skills that apply to almost everything else you'll eventually want to draw. You'll learn how to see proportions, recognize basic shapes, understand perspective, notice light and shadow, and translate a three-dimensional object onto a flat piece of paper.
The best part is that you don't need to wait for inspiration or find the perfect subject. You can practice almost anywhere.
If you're a beginner, start by choosing simple objects and breaking them down into manageable steps. Instead of trying to draw the entire object perfectly from the beginning, learn to see it as a collection of basic shapes and gradually add detail.
Here's how to get started.
Gather a Few Basic Supplies
You don't need expensive art supplies for everyday drawing practice.
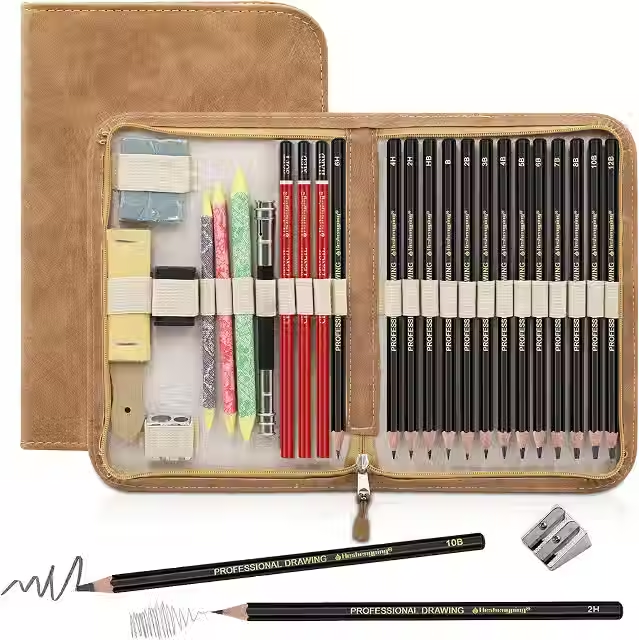
A basic setup can include:
Drawing paper or a sketchbook
HB or 2B pencil
4B or 6B pencil for darker shadows
Kneaded or vinyl eraser
Pencil sharpener
Ruler, if you want to practice straight lines
Blending stump or tissue, although your finger can work for casual practice
A simple sketchbook and an ordinary pencil are enough.
The goal is to practice drawing, not spend hours choosing supplies.

*As an Amazon affiliate I earn from qualifying purchases.
Choose a Simple Object
Start with something familiar and relatively easy to see.
Good beginner subjects include:
Coffee mugs
Drinking glasses
Books
Bottles
Apples
Spoons
Shoes
Plant pots
Boxes
Bowls
Lamps
Simple toys
Headphones
Avoid extremely complicated objects when you're first starting.
A bicycle, for example, contains many overlapping shapes, curves, mechanical parts, and perspective challenges. You can certainly draw one eventually, but a mug will let you focus on basic observation without being overwhelmed.
Set Up Your Object
Place the object somewhere with good lighting.
Natural window light can work beautifully because it creates clear highlights and shadows. You can also use a lamp positioned to one side.
Try not to move the object once you begin.
If you're drawing from observation, consistency matters. If the object changes position every few minutes, you'll have a harder time comparing your drawing with what you're seeing.
Place your object at a comfortable distance where you can see the entire thing clearly.
Step 1: Look Before You Draw

This is one of the most important steps, and beginners often skip it.
Spend a minute simply looking at the object.
Don't worry about drawing yet.
Ask yourself:
How tall is it compared with its width?
Which parts are symmetrical?
Where is the highest point?
Where is the lowest point?
Which direction is the object facing?
Where does the light hit it?
Where is the darkest shadow?
What basic shapes can you see?
This short observation period can make the actual drawing much easier.
Step 2: Find the Basic Shapes
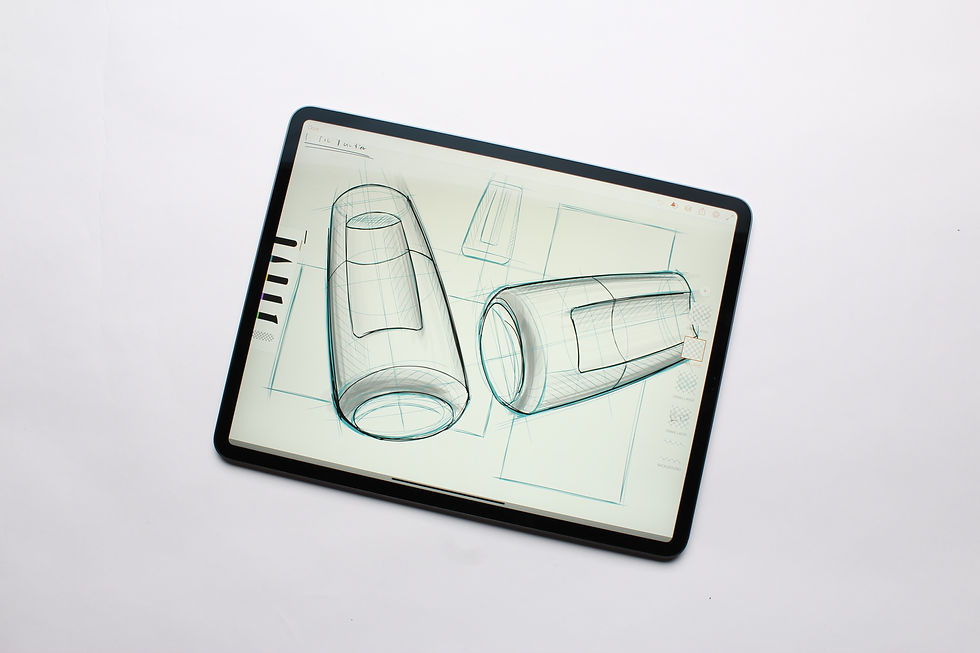
Most everyday objects can be broken down into simple forms.
A mug might contain:
An oval for the opening
A cylinder for the body
A curved shape for the handle
A bottle might be made from:
Cylinders
Ovals
Rectangles
Curved lines
A book can be simplified into:
Rectangles
Parallelograms
Straight lines
An apple might begin as:
A circle or slightly irregular oval
A smaller indentation near the top
A short cylinder-like stem
Don't worry about details yet.
Your goal is to establish the overall structure.
Step 3: Draw Light Construction Lines
Use a light pencil touch to sketch the basic shapes.
These lines are not supposed to be part of the finished drawing
.
They're guides.
For example, if you're drawing a mug, lightly draw the oval opening first. Then establish the sides of the mug and the bottom.
If you're drawing a shoe, lightly indicate the overall length and height before drawing the individual curves.
Construction lines give you something to build on and make it easier to correct mistakes.
Step 4: Establish the Overall Proportions
Before adding details, make sure the object is the right size and shape.
This is where you should make corrections.
If the mug is supposed to be twice as wide as it is tall, check whether your drawing reflects that.
If the bottle has a long neck and short body, make sure those relationships are visible.
One useful technique is to compare measurements visually.
You might mentally divide the object into sections.
For example:
"The handle starts about halfway down the mug."
"The neck of the bottle is about one-third of its total height."
"The book is roughly twice as wide as it is thick."
You don't need exact measurements.
You're training your eye to notice relationships.
Step 5: Check Symmetry
Symmetry is particularly important when drawing cups, bottles, bowls, vases, and other manufactured objects.
A useful technique is to imagine a vertical centerline running through the object.
Check whether the left and right sides relate properly to that line.
If you're drawing a bowl, for example, the left and right sides should generally mirror each other unless the bowl is viewed from an unusual angle.
Don't worry if your first attempt isn't perfectly symmetrical.
You're learning to see it.
Step 6: Understand Perspective
Perspective can make ordinary objects surprisingly challenging.
A coffee mug viewed from slightly above will not have a perfectly flat horizontal opening. You'll see the inside of the mug as an ellipse.
The same applies to bowls, plates, glasses, and bottles.
When you're looking down at an object, horizontal circular surfaces appear more oval.
The more you look down, the wider the visible oval becomes.
When you're nearly level with the object, the oval becomes narrower.
This is why observation is so important.
Don't draw what you think a mug looks like.
Draw what the particular mug looks like from your particular viewpoint.
Step 7: Refine the Outline

Once your basic shapes and proportions are working, begin refining the outer contour.
Replace the construction shapes with more accurate lines.
Look carefully at curves.
Is the side of the mug perfectly straight, or does it taper slightly?
Does the bottle's shoulder curve gradually or sharply?
Does the spoon have a smooth transition from bowl to handle?
These small observations can make a simple drawing feel much more realistic.
Step 8: Add Important Details
Now you can start adding details.
Don't add every tiny feature just because you can see it.
Choose the details that help identify the object.
For a mug, that might be:
The handle
A logo
A rim
A slight indentation
The texture of the surface
For a shoe, it might be:
Laces
Stitching
Sole thickness
Seams
Buckles or other distinctive features
Details should support the structure rather than distract from it.
Step 9: Identify the Light Source
Before adding shading, determine where the light is coming from.
Look at your object.
Which areas are brightest?
Which areas are darkest?
Where does the object cast a shadow?
If light is coming from the upper left, for example, the upper-left surfaces may be lighter while the lower-right areas become darker.
Try to keep your lighting consistent throughout the drawing.
*As an Amazon affiliate I earn from qualifying purchases.
Step 10: Add the Main Shadows
Start with the largest shadow areas rather than tiny details.
You might identify:
The cast shadow beneath the object
A darker side of the object
A shadow inside a mug
The underside of a bowl
A shadow beneath a book
Use light pressure at first.
You can always make a shadow darker, but it's harder to make it lighter after you've heavily shaded the area.
Step 11: Build Up the Shading
Gradually increase the darkness where needed.
Try using different pencil pressures.
Light pressure creates lighter values.
More pressure creates darker values.
You can also layer strokes rather than pressing extremely hard.
Pay attention to transitions.
Not every area changes abruptly from light to dark. Rounded objects often have gradual transitions between highlights and shadows.
Step 12: Add the Cast Shadow

The shadow on the surface underneath the object can make a huge difference.
Without a cast shadow, an object can appear to float.
Look carefully at the shadow's shape.
If the light is coming from the left, the shadow may extend toward the right.
The closer the object is to the surface, the darker and sharper the shadow may appear near its base.
Farther away, the shadow may become softer.
You don't have to create perfectly realistic shadows.
Just observe what is actually happening in front of you.
Step 13: Add Texture Carefully
Texture can make an everyday object feel much more believable.
A wooden object might have grain.
A knitted item might have visible loops.
A metal object may have smooth reflective surfaces.
A ceramic mug might have a slightly uneven glaze.
But don't draw every texture detail you see.
Look for the patterns that communicate the material.
A few carefully placed marks can often suggest texture better than covering the entire object with lines.
Step 14: Add Highlights
Highlights are areas where light is strongly reflected.
On a glass, metal spoon, or glossy ceramic surface, you may see bright spots.
You can preserve these areas by simply leaving the paper white.
If you've already shaded over them, a kneaded eraser can sometimes lift graphite and create a lighter highlight.
Highlights can add a surprising amount of dimension.
How to Draw a Coffee Mug Step by Step

A mug is an excellent beginner subject because it combines several useful drawing skills.
1. Draw the opening
Start with a light oval.
Don't make it too wide or too narrow. Compare it with the overall width of the mug.
2. Add the sides
Draw two light lines extending downward from the sides of the oval.
They don't necessarily have to be perfectly vertical. Many mugs taper slightly.
3. Add the bottom
Connect the sides with a gentle curve or partial oval, depending on your viewpoint.
4. Draw the handle
Think of the handle as a curved tube rather than a single line.
Start where it attaches to the mug and follow its overall shape.
5. Refine the outline
Erase unnecessary construction lines and adjust the curves.
6. Add the interior
If you can see inside the mug, add the inner rim and the darker area inside.
7. Shade
Determine where the light is coming from and add gradual shading to the body.
8. Add the cast shadow
Draw the shadow beneath the mug so it feels grounded on the surface.
How to Draw an Apple Step by Step
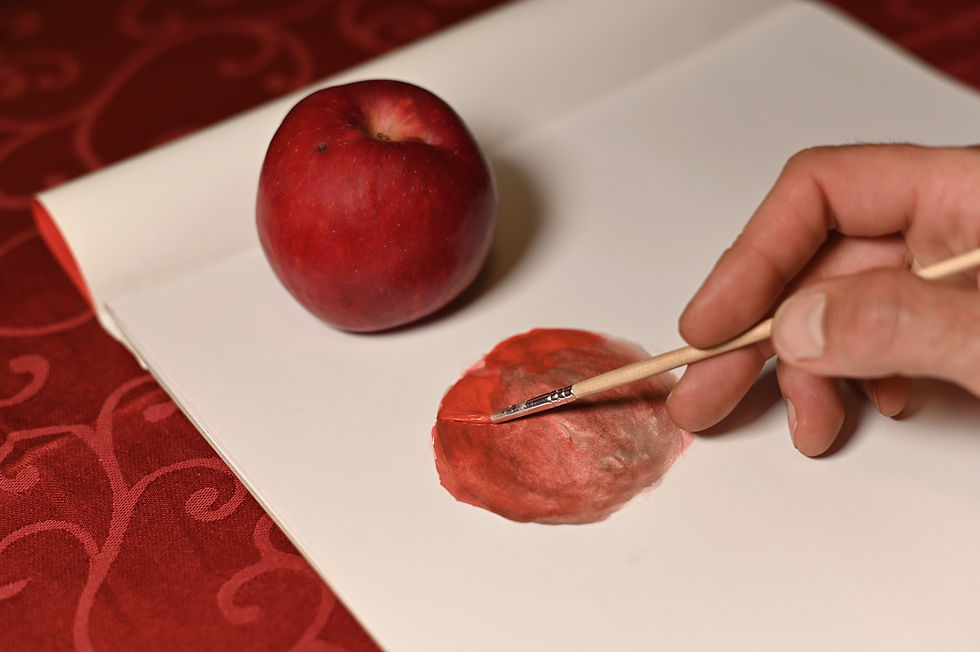
An apple is a great exercise for learning organic shapes.
1. Start with a loose circle
Don't make it perfectly round.
Real apples have irregular curves.
2. Adjust the shape
Add the slight dips and bulges that make the apple recognizable.
3. Add the top indentation
Most apples have a subtle depression around the stem.
4. Add the stem
Keep it relatively simple.
5. Identify the light source
Look for the brightest area and the darker side.
6. Shade gradually
Use curved pencil strokes that follow the general form of the apple.
7. Add the cast shadow
Place a soft shadow beneath the apple.
This helps establish its position on the table.
How to Draw a Book Step by Step

Books are useful for practicing straight lines and perspective.
1. Draw the front cover
Start with a rectangle or slightly angled quadrilateral, depending on the viewpoint.
2. Add the thickness
Draw the edges that show how thick the book is.
3. Add the pages
Use several closely spaced lines to indicate the page block.
You don't need to draw every page.
4. Add the spine
Pay attention to where the spine meets the covers.
5. Add details
You can include a title, decorative border, or other design elements.
6. Add shadows
Darken the underside and areas where the covers overlap.
7. Add the cast shadow
A simple shadow beneath the book will help it sit naturally on the surface.
How to Draw a Plant in a Pot

Plants are excellent subjects because they combine geometric and organic forms.
1. Draw the pot
Start with a simple cylinder or tapered shape.
2. Add the opening
Use an oval to show the top of the pot.
3. Establish the plant's overall shape
Instead of drawing every leaf immediately, lightly indicate the general area occupied by the plant.
4. Add stems
Draw the main stems before individual leaves.
5. Add the leaves
Look carefully at their different sizes, directions, and overlaps.
6. Add shadows
Shade the inside of the pot and areas where leaves overlap.
7. Add texture
A few marks can suggest soil, ceramic, or leaf texture.
How to Draw a Pair of Shoes

Shoes can be more challenging because of their irregular shapes, but they're excellent practice.
1. Find the overall silhouette
Ignore the laces and details at first.
Draw the basic shape of the shoe.
2. Establish the sole
Pay attention to its thickness and angle.
3. Add the upper sections
Identify the toe, heel, tongue, and other major areas.
4. Add the laces
Draw them according to the perspective of the shoe rather than placing them as perfectly horizontal lines.
5. Add stitching and texture
Use only enough detail to communicate the material.
6. Add shadows
Look for darker areas inside the shoe and beneath the sole.
Shoes are a good reminder that complicated-looking objects become much easier when you tackle them one section at a time.
Practice With Different Materials
Once you're comfortable drawing basic forms, challenge yourself with objects made from different materials.
Try:
Glass: Practice transparency, reflections, and highlights.
Metal: Look for sharp highlights and strong value changes.
Wood: Experiment with grain and uneven texture.
Fabric: Study folds, wrinkles, and soft shadows.
Ceramic: Look for smooth surfaces and subtle reflections.
Plastic: Notice how different finishes reflect light.
Learning to communicate materials is an important step toward more realistic drawing.
Draw the Same Object From Different Angles
One of the best exercises you can do is draw the same object several times from different viewpoints.
Draw a mug from the front.
Then draw it from slightly above.
Then from the side.
Then from farther away.
You'll begin to notice how perspective changes the appearance of the same object.
This is much more useful than drawing one object perfectly and never looking at it again.
Draw Objects in Different Lighting
Lighting can completely change an object.
Place your object near a window in the morning.
Draw it again later in the day.
Try artificial light at night.
Move the lamp from one side to another.
Notice how the shadows change.
This exercise teaches you that shading isn't about memorizing where dark areas "belong."
It depends on the light.
Practice Negative Space
Sometimes it's easier to draw the empty spaces around an object than the object itself.
This is called negative space.
For example, look at the opening inside a mug handle.
Instead of thinking, "I'm drawing a handle," focus on the shape of the empty space.
Is it narrow?
Is it oval?
Is it wider at the bottom?
This technique can be surprisingly helpful when you're struggling with proportions.
Don't Erase Every Mistake Immediately
Erasing can be useful, but constantly erasing can interrupt your observation.
If a line is slightly wrong, sometimes leave it and continue.
You may discover that the surrounding shapes help you correct it naturally.
Sketching is about exploration.
Your page doesn't have to be perfectly clean while you're figuring things out.
Use Reference Objects Instead of Memory

Drawing from imagination has its place, but beginners can learn much faster by drawing from observation.
Put the object directly in front of you.
Look at it.
Compare it with your drawing.
Make adjustments.
Your memory tends to simplify objects into symbols.
Observation teaches you to see the actual shapes.
Don't Focus on Details Too Early
This is one of the most common beginner mistakes.
You spend ten minutes carefully drawing the logo on a mug, only to discover that the entire mug is too narrow.
Always work from large to small.
Start with:
Overall shape
Proportions
Perspective
Major forms
Shadows
Details
Texture
This order saves time and makes your drawings more accurate.
Make Drawing a Daily Habit
You don't need an hour every day.
Choose one everyday object and spend ten or fifteen minutes drawing it.
Monday could be a mug.
Tuesday could be a spoon.
Wednesday could be a shoe.
Thursday could be a plant.
Friday could be a book.
The point isn't to create a masterpiece.
It's to train your eyes and hands.
Over time, you'll become faster at identifying shapes, proportions, perspective, and values.
Keep Your Early Drawings
Don't throw away everything you don't like.
Keep your sketches.
Date them.
After a few months, look back.
You may be surprised at the difference.
Progress in drawing can be difficult to notice when you're working on individual pieces. Seeing a collection of older sketches can make improvements much more obvious.
Turn Everyday Life Into a Drawing Exercise

Once you start looking at everyday objects as drawing subjects, you'll realize there are opportunities everywhere.
Your breakfast bowl.
Your keys.
A pair of sunglasses.
A backpack.
A water bottle.
A lamp.
A stack of books.
Your favorite chair.
Even something as ordinary as a spoon can become an interesting study of shape, reflection, and perspective.
You don't need to wait for the perfect artistic subject.
Look around you.
Keep Practicing What Feels Difficult
If you struggle with circles, draw mugs and bowls.
If perspective gives you trouble, draw books and boxes.
If organic shapes are difficult, practice fruit, plants, and clothing.
If shading feels confusing, choose simple objects and study them under one strong light source.
Instead of avoiding the things you're bad at, use everyday objects to practice them.
Drawing Is Really About Learning to See
When you first start drawing everyday objects, you may think you're learning how to make better lines.
You're actually learning something much bigger: how to see.
You're learning to notice proportions instead of assuming them.
You're learning to recognize basic forms.
You're learning how light changes surfaces.
You're learning how objects occupy space.
You're learning to pay attention to details you might normally overlook.
And that skill carries into almost every other kind of drawing.
Start With What's Around You

You don't need a professional studio, expensive equipment, or an exotic subject to improve your drawing.
Pick up a pencil.
Choose something sitting nearby.
Look at it carefully.
Break it into simple shapes.
Sketch those shapes lightly.
Check your proportions.
Refine the outline.
Add shadows.
Finish with a few carefully chosen details.
Then do it again tomorrow with something else.
A mug, a book, an apple, or a pair of shoes may not seem particularly exciting at first. But when you start studying them closely, you'll discover that everyday objects contain everything an artist needs to practice: shape, form, perspective, texture, light, shadow, and proportion.
The more often you draw what you see, the more naturally those skills will develop.
And eventually, you'll start looking at the ordinary things around you a little differently. Instead of seeing just a mug on the table, you'll see an oval, a cylinder, a curved handle, a highlight, a shadow, and an interesting little drawing waiting to happen.
LEARN MORE:
*As an Amazon affiliate I earn from qualifying purchases.


Comments