


Portrait Drawing Tips for Beginners and Intermediate Artists


Drawing a portrait can be both exciting and intimidating. A face contains so many small details that it can be tempting to start with the eyes, carefully draw every eyelash, and hope the rest of the portrait somehow comes together.
Usually, that's not the easiest approach.
A successful portrait starts with understanding the overall structure of the head. Once you have the proportions, placement, and basic shapes working, you can gradually add features, shadows, textures, and details.
Whether you're picking up a pencil for the first time or you've already been drawing portraits for a while, improving your portrait skills mostly comes down to learning how to observe carefully and practice consistently.
You don't need to create a perfect likeness every time. In fact, some of the most valuable lessons come from drawings that don't quite work.
Start With Basic Shapes
Before worrying about eyes, noses, or lips, look at the head as a collection of simple shapes.
The skull can be thought of as a rounded form, while the jaw adds another set of angles and curves beneath it.
Try lightly sketching an oval or rounded shape to represent the cranium and then add the jaw.
This initial construction doesn't need to look like a finished head.
It's simply a framework that helps you understand where everything else belongs.
Learn Basic Facial Proportions
Understanding general proportions gives you a useful starting point.
A common guideline is to divide the face into sections using horizontal and vertical construction lines.
For a front-facing head, you can begin with a center line running vertically down the face. Then add horizontal guidelines to help position the eyes, nose, and mouth.
These are guidelines rather than strict rules.
Faces vary enormously from person to person. Someone may have a high forehead, a short chin, wide-set eyes, or a long nose.
The purpose of proportional guidelines is to help you understand structure, not to make every face look identical.
Don't Assume Everyone Has the Same Proportions

Once you understand general facial proportions, start paying attention to individual differences.
One person's eyes may sit relatively close together.
Another person may have a wider distance between the eyes.
A person's nose may extend farther forward or have a much shorter bridge.
The jaw may be square, rounded, narrow, or broad.
These differences are often what make a portrait recognizable.
If you use the same proportions for every person, your portraits may look like variations of the same face.
Begin With the Overall Head Shape
Before drawing individual features, study the shape of the entire head.
Look at the width of the forehead.
Notice where the cheekbones extend outward.
Observe the jawline.
Pay attention to the chin.
Try to identify the major angles and curves.
A portrait can have beautifully drawn eyes and still look wrong if the overall head shape isn't accurate.
Use Reference Photos
Reference photos are extremely helpful, particularly while you're learning.
Choose a clear photograph with good lighting.
Avoid starting with an extremely complicated pose or heavily edited image.
A simple portrait with the face clearly visible will give you more useful information.
As you improve, you can challenge yourself with different angles, expressions, lighting conditions, and ages.
Try Drawing From Life

Photographs are convenient, but drawing from a real person teaches you something different.
A person sitting in front of you gives you a sense of depth and three-dimensional form that a flat photograph doesn't completely capture.
Start with short sessions.
Ask someone to sit still for ten or fifteen minutes while you make a quick sketch.
Don't worry about finishing.
The goal is to practice observing a real face.
Don't Start With the Eyes
This is one of the most common beginner mistakes.
Eyes are interesting and fun to draw, so it's natural to want to start there.
The problem is that beautifully rendered eyes don't help much if the head is the wrong size or the features are positioned incorrectly.
Start with the large structure.
Then place the features.
Only after everything is in the right general location should you begin adding detailed rendering.
Learn the Structure of the Eye
When you're ready to draw the eyes, remember that an eye isn't simply an almond-shaped outline with a circle inside it.
The eyeball is roughly spherical and sits inside the eye socket.
The eyelids wrap around that form.
The upper lid often casts a shadow over the eye.
The iris sits on the surface of the eyeball, while the pupil is inside it.
Thinking about the eye as a three-dimensional structure will make your drawings much more convincing.
Don't Outline Everything Equally

A common beginner habit is to draw a dark line around every feature.
Real faces don't work that way.
Edges vary depending on lighting, form, and the surrounding shapes.
Some edges are sharp.
Some are soft.
Some almost disappear.
Instead of outlining the entire eye, nose, lips, and face with the same dark line, observe where the actual shadows and boundaries are.
This creates a more natural appearance.
Pay Attention to the Nose as a Form
The nose can be difficult because there isn't always a strong line outlining its entire shape.
Think about it as a three-dimensional structure.
Look for:
The bridge
The sides
The tip
The nostrils
The wings of the nose
The shadow underneath
Instead of drawing a hard outline around everything, use changes in value to describe the form.
This often produces a more realistic nose.
Practice Drawing Lips as Forms
Lips are another area where beginners often rely too heavily on outlines.
The mouth is made up of curved forms that wrap around the front of the face.
Pay attention to the central line where the lips meet, but don't make every edge equally dark.
Observe the highlights and shadows.
The upper lip is often darker than the lower lip, although lighting and individual features vary.
The lower lip may catch more light because of its orientation.

*As an Amazon affiliate I earn from qualifying purchases.
Don't Overdraw the Eyebrows
Eyebrows are made of individual hairs, but drawing every hair can make them look unnatural.
Begin with the overall shape and value.
Then add a few directional hairs where they're actually visible.
Notice how the hairs change direction throughout the brow.
Small variations make the eyebrows look much more convincing than dozens of identical lines.
Understand the Ears
Ears are often neglected because they seem less important than the eyes and mouth.
But they contribute to the overall structure of the head.
Instead of trying to memorize every fold, look for the large shapes.
The outer rim, inner curves, and central depression create the basic structure.
Practice drawing ears separately until their forms become more familiar.
Learn to See Light and Shadow

Shading isn't simply about making some areas darker.
It's about describing how light interacts with three-dimensional forms.
Start by identifying the main light source.
Then look for:
Highlights
Light areas
Halftones
Core shadows
Reflected light
Cast shadows
Understanding these relationships will help your portrait feel three-dimensional.
Start With Large Areas of Value
Don't immediately shade individual eyelashes or tiny wrinkles.
Begin by identifying the major light and dark areas.
For example, perhaps one side of the face is mostly in shadow while the other side receives light.
Block in those broad areas first.
Once the major values are working, you can gradually refine them.
Use a Range of Values
A portrait can look flat if everything is the same shade of gray.
Try using a broad range of values from light to dark.
Your darkest areas might appear in places such as the pupils, nostrils, or deepest areas of the hair.
Your lightest values may occur on areas catching direct light.
You don't necessarily need pure black and pure white in every drawing.
What matters is creating enough contrast to describe the forms.
Don't Shade Every Area Equally
Faces contain subtle transitions.
If you shade everything with equally dark pencil marks, the portrait can become heavy.
Instead, observe where the forms change gradually.
Cheeks, foreheads, and other rounded areas often transition softly between light and shadow.
Sharper changes may occur around the edges of certain features or where one form overlaps another.
Practice With a Single Light Source

A single light source makes shadows easier to understand.
Place a lamp to one side of a simple object such as a ball or egg.
Draw the object.
Notice how the light creates a highlight, gradually transitions into shadow, and produces a cast shadow.
Then apply the same thinking to a face.
The human head is much more complicated, but the underlying principle is similar.
Use Hatching and Cross-Hatching
If you're working with pencil or pen, hatching can help create value.
Hatching uses lines placed close together.
Cross-hatching adds another layer of lines crossing the first direction.
You can create lighter areas with fewer, more widely spaced marks and darker areas with denser marks.
Try following the direction of the form with your marks.
For example, curved strokes can help reinforce the roundness of a cheek.
Try Blending Carefully
Blending can create smooth transitions, but don't rely on it for everything.
If you blend every part of the drawing until there are no visible pencil marks, the portrait can lose some of its character.
Sometimes controlled pencil strokes create more interesting texture.
Use blending where you need a smooth transition and leave other areas with visible marks when they contribute to the drawing.
Use Your Eraser as a Drawing Tool
An eraser isn't only for fixing mistakes.
You can use it to create highlights.
After building up some graphite, gently lift sections with a kneaded eraser.
This can create highlights on:
The forehead
Nose
Cheekbones
Lower lip
Eyes
Hair
Thinking of the eraser as another drawing instrument can make your shading much more flexible.
Learn to Draw Hair as Masses

One of the biggest mistakes beginners make is drawing hair strand by strand.
Start with the overall shape.
Look at the silhouette.
Identify the major light and dark areas.
Then divide the hair into larger sections.
Only after establishing those masses should you add individual strands.
A few carefully placed strands will usually look more convincing than hundreds of equally detailed lines.
Pay Attention to Hair Direction
Hair grows in different directions depending on the area of the head.
Observe where it parts.
Notice how it moves around the forehead, temples, crown, and sides.
Your pencil strokes should generally follow those directions.
This helps the hair appear attached to the head rather than pasted onto it.
Practice Different Head Angles
A front-facing portrait is a useful place to begin, but don't stay there forever.
Practice:
Three-quarter views
Profiles
Looking up
Looking down
Slightly tilted heads
A three-quarter view is particularly useful because it helps you understand how the features wrap around the face.
Learn the Three-Quarter View
In a three-quarter view, you can see both the front and side of the face.
The center line of the face curves across the head rather than remaining perfectly straight on the page.
The far eye may appear narrower.
The nose extends toward the viewer.
The mouth follows the curvature of the face.
This can be challenging, but it teaches you to think of the face as a three-dimensional form rather than a flat collection of features.
Practice Profiles

A profile shows the face from the side.
This is an excellent exercise for learning the relationship between the forehead, nose, lips, chin, and neck.
The silhouette becomes particularly important.
Before worrying about shading, try drawing the profile using simple contour lines.
Focus on capturing the unique shape of the person's features.
Don't Forget the Neck and Shoulders
A floating head can make a portrait feel unfinished.
The neck and shoulders provide important context.
Study how the neck connects to the base of the skull.
Notice the slope of the shoulders.
Pay attention to clothing if it's visible.
You don't necessarily need to draw every detail, but including enough of the surrounding structure can make the portrait feel more complete.
Consider the Background
The background can influence how the portrait looks.
A completely blank background can make the face stand out, while a simple value or tonal background can create more depth.
You can also use the background to frame the head.
If the hair is very light, a slightly darker background may help it stand out.
If the hair is dark, a lighter background can provide contrast.
Capture Expression
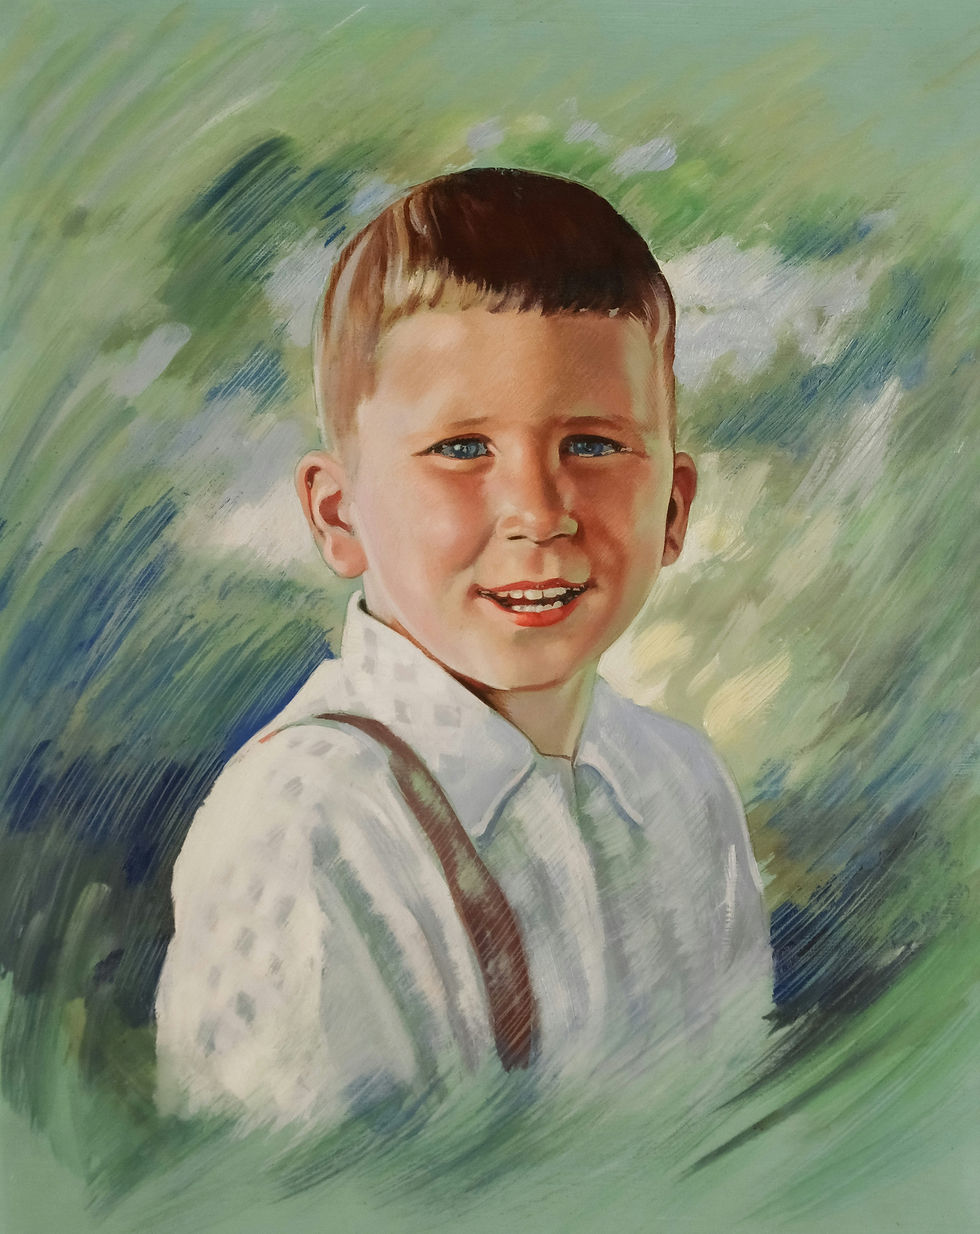
A technically accurate face can still feel lifeless if the expression isn't captured.
Expressions involve more than the mouth.
Pay attention to:
Eyebrow position
Eyelid shape
Mouth position
Cheek movement
Forehead lines
Jaw tension
A small change in the eyebrows can completely change the emotional quality of a portrait.
Don't Exaggerate Features Accidentally
When you're concentrating on one feature, it's easy to make it larger or darker than it should be.
You might spend so much time on the eyes that they become oversized.
You might darken the lips until they dominate the entire face.
Step back regularly and look at the portrait as a whole.
If something feels too prominent, lighten or adjust it.
Check Your Drawing in Reverse
One useful trick is to look at your drawing in a mirror.
You can also photograph it and flip the image horizontally.
This makes familiar mistakes easier to notice.
You may suddenly see that one eye is higher than the other or that the head is tilted differently than you intended.
When you've been staring at a drawing for a long time, your brain can become accustomed to its mistakes.
Changing the view can help reset your perception.
Take Breaks
Don't work on a portrait for hours without stepping away.
After twenty or thirty minutes, take a short break.
Look at something else.
Then return to your drawing.
You may immediately notice proportions or values that you hadn't seen before.
Fresh eyes are surprisingly useful.
Work From General to Specific

A useful portrait workflow is:
Establish the head shape.
Add construction lines.
Place the major facial features.
Check proportions.
Establish large light and dark areas.
Develop the individual features.
Add hair and smaller details.
Refine edges and values.
Make final adjustments.
This prevents you from spending twenty minutes rendering an eye that eventually needs to be moved.
Don't Erase Too Early
If you're unsure about a line, don't immediately erase it.
Sometimes keeping your construction lines visible while you work helps you compare the different shapes.
Once you're confident about the structure, you can clean up unnecessary marks.
This approach can also make the process less frustrating because you're treating the early drawing as a working map rather than a finished image.
Practice Individual Features
Although full portraits are important, practicing individual features can accelerate your progress.
Spend a few sessions drawing only eyes.
Then practice noses.
Then lips.
Then ears.
Try different angles and lighting conditions.
The goal isn't to create a collection of isolated perfect features.
It's to become more comfortable understanding their shapes and structures.
Practice With Different Faces

Don't draw the same type of face repeatedly.
Use references with different:
Ages
Face shapes
Skin tones
Hair types
Facial structures
Expressions
Angles
This will force you to observe rather than rely on a mental formula.
Practice Different Skin Tones
If you're drawing in color, pay attention to the complexity of skin.
Skin isn't simply peach, brown, tan, or pink.
It contains many subtle variations influenced by lighting, environment, undertones, and individual characteristics.
Instead of choosing a single "skin color," observe the actual colors you see.
You may find warmer tones around some areas and cooler tones in shadows.
In pencil drawings, value and edge control are particularly important for describing skin.
Try Different Drawing Materials
Pencil is an excellent place to start, but don't be afraid to experiment.
You might try:
Graphite pencils
Charcoal
Colored pencils
Pastels
Ink
Conté
Digital drawing tools
Each medium encourages a different approach.
Charcoal can make bold, expressive portraits.
Colored pencils allow careful layering.
Ink encourages confident marks because erasing isn't usually an option.
Digital tools provide opportunities to experiment with layers and adjustments.

*As an Amazon affiliate I earn from qualifying purchases.
Keep Your Supplies Simple
You don't need dozens of pencils to get started.
A small selection of graphite pencils, a good sketchbook or drawing paper, a kneaded eraser, and a regular eraser can take you a long way.
If you're using graphite, having a few different hardness levels gives you flexibility for lighter construction lines and darker details.
The most important tool, however, is your observation.
Use Measuring Techniques
If you're struggling with proportions, try measuring instead of guessing.
You can use your pencil as a measuring tool.
Hold it at arm's length and use your thumb to mark relative distances.
For example, compare the width of the head to its height.
You can also compare the distance between the eyes with the width of the nose or mouth.
These relative measurements can help you identify mistakes before you've invested too much time in details.
Try the Grid Method Occasionally
A grid can help beginners understand proportion.
Place a light grid over your reference photograph and a corresponding grid on your drawing surface.
Then work one section at a time.
The grid breaks a complicated portrait into smaller shapes.
You don't need to rely on it forever.
As your observational skills improve, gradually move away from grids and practice drawing more independently.
Focus on Likeness

If your goal is to capture a person's likeness, details aren't necessarily the most important factor.
The overall relationships between features matter enormously.
The shape of the head, placement of the eyes, angle of the nose, width of the mouth, and proportions of the jaw all contribute to recognition.
A portrait with minimal detail can look remarkably like the subject if these relationships are accurate.
A highly detailed drawing can look like a completely different person if the underlying proportions are wrong.
Learn to Simplify
Intermediate artists sometimes encounter the opposite problem from beginners.
Instead of not adding enough information, they add too much.
Not every wrinkle, hair, pore, or eyelash needs to be included.
Ask yourself which details actually contribute to the portrait.
Simplification can make a drawing stronger.
Study Negative Space
Negative space is the area around and between objects.
In portrait drawing, look at the shapes created by the spaces around the head, neck, hair, and shoulders.
You can also observe the small spaces between features.
Sometimes it's easier to identify an incorrect shape by looking at the empty space around it.
This is a particularly useful skill for intermediate artists.
Study Other Artists
Look at portraits created by artists you admire.
Don't simply copy their finished drawings.
Study how they handle:
Edges
Light
Shadow
Proportions
Brush or pencil marks
Hair
Backgrounds
Simplification
Ask yourself what makes their work recognizable.
You can learn a great deal by carefully analyzing how another artist solves visual problems.
Keep a Portrait Sketchbook

Consider keeping a separate sketchbook just for portrait practice.
You can fill it with quick studies rather than worrying about finished pieces.
Try five-minute sketches.
Then ten-minute studies.
Then thirty-minute drawings.
Date each one.
Over time, you'll have a visual record of your progress.
Don't Spend Every Drawing Trying to Create a Masterpiece
Some of your best learning will happen in drawings you never show anyone.
Try quick studies.
Draw faces that are intentionally challenging.
Experiment with unfamiliar angles.
Practice expressions.
Use materials you aren't comfortable with.
Because you don't expect these drawings to be finished artwork, you're more likely to experiment.
Give Yourself Specific Challenges
Instead of simply saying, "I'm going to practice portraits," give yourself a particular goal.
For example:
Week 1: Practice head shapes.
Week 2: Draw eyes from different angles.
Week 3: Study noses and how light affects them.
Week 4: Practice three-quarter views.
Week 5: Draw different expressions.
Specific challenges make practice more focused.
Try Timed Portraits

Set a timer for five, ten, or twenty minutes.
Try to capture the subject before the time runs out.
Timed drawings force you to prioritize.
You won't have time to obsess over eyelashes or individual hairs.
Instead, you'll focus on proportions, gesture, major shapes, and values.
This can be particularly useful for intermediate artists who tend to overwork their drawings.
Take Progress Photos
Photograph your drawings as you go.
Take one photo early in the process and another when you're finished.
You can compare them later and identify where things went wrong.
You can also photograph your work from different angles or flip it horizontally to catch proportion problems.
Learn From Your Mistakes
When a portrait doesn't look right, don't simply throw it away.
Ask what went wrong.
Was the head too narrow?
Were the eyes too high?
Was the nose too long?
Did the jaw have the wrong shape?
Were the shadows too dark?
Was the hair treated as individual strands instead of larger forms?
Identifying the specific problem turns a disappointing drawing into a useful lesson.
Be Patient With Progress
Portrait drawing takes time to develop because you're learning several skills simultaneously.
You need to understand proportion, anatomy, perspective, value, edges, expression, and observation.
You aren't going to master all of them at once.
Instead, look for small improvements.
Maybe your head shapes are becoming more accurate.
Maybe your eyes look more three-dimensional.
Maybe you're becoming better at recognizing light and shadow.
Those small improvements eventually add up.
The Most Important Skill Is Observation

You can memorize hundreds of portrait-drawing rules, but observation will always matter more.
Look carefully.
Measure when necessary.
Notice differences.
Compare shapes.
Study the direction of light.
Pay attention to subtle changes.
Don't draw what you think a nose or eye is supposed to look like.
Draw the specific nose or eye in front of you.
That shift—from drawing symbols to drawing what you actually see—is a major step forward.
Keep Practicing
The best way to improve at portraits is to draw people regularly.
You can sketch family members, friends, yourself, people from reference photographs, or strangers from public-domain references.
Try quick sketches and longer studies.
Work from different angles.
Experiment with different materials.
Some drawings will be successful.
Others won't.
That's normal.
Every portrait gives you another opportunity to understand the human face.
Keep the Process Enjoyable
Portrait drawing can become frustrating if every session is judged by whether the final image looks realistic.
Try to enjoy the individual stages.
Enjoy figuring out the head shape.
Enjoy finding the placement of the eyes.
Enjoy watching the shadows develop.
Enjoy discovering how a few carefully placed lines can change an expression.
You don't have to finish every session with a perfect portrait.
Sometimes the most valuable thing you can finish with is a better understanding of what you want to work on next.
Your Portrait Skills Will Grow With You
Learning to draw portraits is a gradual process.
Beginners can start by learning basic proportions, simple shapes, and the structure of individual features. Intermediate artists can push further by studying anatomy, perspective, subtle values, edge control, expressions, and individual likeness.
No matter your current level, the same basic approach remains useful: observe carefully, build from large shapes to small details, check your proportions often, and don't rush into rendering.
Most importantly, keep drawing.
The more faces you study, the more you'll begin to notice the incredible variety in human features. You'll develop a better understanding of structure, light, and expression, and eventually many of the things that once felt complicated will become much more intuitive.
Your early portraits don't need to be perfect.
They simply need to be drawn.
LEARN MORE:

*As an Amazon affiliate I earn from qualifying purchases.


Comments