


Acrylic Painting Techniques for Beginners and Beyond


Acrylic paint is one of the most approachable painting mediums for beginners, but that doesn't mean there's a limit to how much you can do with it. Acrylics can be used for soft, blended landscapes, bold graphic artwork, detailed portraits, textured paintings, abstract pieces, and everything in between.
One of the reasons acrylics are so popular is their versatility. They can be diluted with water, layered, mixed with mediums, applied thickly, or brushed on in thin transparent washes. They also dry relatively quickly, which makes it possible to build up a painting in layers without waiting days between applications.
If you're just getting started, learning a handful of basic techniques can give you a strong foundation. As you become more comfortable, you can experiment with more advanced approaches and eventually develop techniques that become part of your own painting style.
Start With the Right Acrylic Supplies
You don't need a huge collection of paints to begin.
A basic set of acrylic paints can include colors such as:
Titanium white
Carbon or ivory black
Ultramarine blue
Phthalo blue
Cadmium or pyrrole red
Yellow ochre
Cadmium or primary yellow
Burnt umber
With a small selection of colors, you can mix a surprisingly wide range of shades.
You'll also want a few different brushes. A flat brush is useful for broad areas and clean edges, while a round brushworks well for details and curved lines. A filbert brush, which has a rounded, flattened tip, can be useful for blending and creating softer shapes.
Choose brushes in several sizes rather than buying dozens at once.
Understand How Quickly Acrylics Dry

Acrylics dry much faster than oils, which is both an advantage and a challenge.
The quick drying time allows you to paint several layers in one session, but it also means paint can dry on your palette or brush before you're ready to use it.
Work with relatively small amounts of paint and keep your brushes moist while you're working. Don't leave brushes sitting in a pile of wet paint, either. Rinse them regularly and clean them thoroughly when you're finished.
If you're struggling with paint drying too quickly, you can experiment with a stay-wet palette or acrylic mediums designed to extend working time.
Practice Painting Solid Shapes
Before jumping into a complicated landscape or portrait, practice creating simple shapes.
Paint:
Squares
Circles
Triangles
Lines
Blocks of color
Try to fill each shape evenly.
This helps you learn how much paint to load onto your brush and how much pressure to use. It also gives you a chance to become comfortable with the consistency of acrylic paint.
Try Flat Painting

Flat painting involves applying an even area of color without obvious variations in value or texture.
It's particularly useful for:
Illustrations
Graphic artwork
Backgrounds
Decorative paintings
Stylized subjects
Load your brush with enough paint to cover the area, then apply it with consistent strokes.
If the paint looks patchy, allow the first layer to dry and apply another coat rather than repeatedly brushing the same wet area.
Learn to Layer Paint
Layering is one of the most useful acrylic techniques.
You can start with a basic background and gradually add additional shapes and details on top.
For example, a landscape might begin with:
A sky
Distant mountains
A middle-ground landscape
Trees
Foreground details
Because acrylics dry relatively quickly, you can build the image progressively.
Layering also makes it easier to correct mistakes.
Work From Dark to Light
Many acrylic painters find it helpful to establish darker areas first and gradually add lighter colors.
For example, when painting a tree, you might begin with a dark green base, add medium green shapes, and then place lighter green highlights where the light hits the leaves.
This approach can create depth without requiring every area to be perfectly blended.
You can also work from light to dark, depending on your subject and style. Acrylics are flexible enough to support either approach.
Practice Color Mixing

Color mixing is one of the most important skills you can develop.
Instead of buying every shade you want, learn what happens when you combine the colors you already have.
Try making a color chart.
For example, mix different amounts of:
Blue + Yellow
Red + Yellow
Red + Blue
Then experiment with adding white or small amounts of complementary colors.
You'll quickly begin to understand how your particular paints behave.
Don't Use Too Much Black
Black is useful, but it isn't always the best way to darken another color.
Adding black to yellow, for example, can produce a dull greenish or muddy result.
Instead, experiment with darker versions of the color itself or with complementary colors.
For example, a deep blue or violet may create a more interesting shadow than straight black.
Learn to Mix Tints and Shades
A tint is a color mixed with white.
A shade is generally a color made darker.
Take one color and create a series of variations.
For example:
Blue → light blue → medium blue → dark blue
This simple exercise helps you understand value and gives you more control over your paintings.
Practice Color Temperature

Colors can feel warm or cool.
Reds, oranges, and yellows are generally considered warm, while blues, greens, and some violets tend to feel cooler.
But temperature is relative.
A warm blue might look noticeably different from a cool blue when placed next to it.
Experimenting with warm and cool versions of colors can add depth and atmosphere to your paintings.
Try Dry Brushing
Dry brushing involves using a relatively small amount of paint on a mostly dry brush.
Instead of creating a solid block of color, the brush leaves broken marks.
This technique can be useful for:
Grass
Hair
Wood
Rocks
Clouds
Rough textures
Weathered surfaces
Try dipping your brush lightly into paint, removing some of the excess, and then dragging it across the surface.
The result should look textured rather than completely smooth.
Experiment With Wet-on-Dry Painting
Wet-on-dry means applying wet paint to a dry painted surface.
This is one of the easiest acrylic techniques to learn.
Because the underlying layer has already dried, your new paint generally stays where you put it.
This makes the technique excellent for adding:
Details
Shadows
Highlights
Edges
Patterns
Additional layers
It's also one reason acrylics are so forgiving for beginners.
Try Wet-on-Wet Painting
Wet-on-wet involves applying one wet color into another wet color.
Acrylics make this more challenging than oils because they dry quickly, but it can still be done.
Work quickly and use a slightly slower-drying medium if necessary.
Wet-on-wet techniques can create soft transitions in skies, backgrounds, and abstract paintings.
Learn Basic Blending
Blending with acrylics takes practice because the paint dries relatively quickly.
Start with two colors next to each other.
While they're still wet, gently work the meeting point with a clean or lightly loaded brush.
Don't keep brushing indefinitely.
If the paint starts becoming sticky, let the area dry and return to it with another layer.
You can also create smooth transitions by layering several intermediate colors instead of trying to blend everything at once.
Try Glazing
Glazing involves applying a thin, transparent layer of color over a dry layer beneath it.
You can use an acrylic glazing medium to create transparency while maintaining the paint's characteristics.
For example, you could paint a warm orange glaze over a landscape to create a sunset-like atmosphere.
Glazing is especially useful when you want to subtly change the color or mood of an area without completely covering what's underneath.

*As an Amazon affiliate I earn from qualifying purchases.
Experiment With Transparent Washes
Acrylic paint can be thinned to create a more transparent effect.
This can be useful for loose backgrounds, atmospheric effects, and certain watercolor-like approaches.
However, simply adding large amounts of water isn't always the best way to create a controlled transparent layer. Acrylic mediums designed for glazing or transparency can give you more predictable results.
Try Scumbling
Scumbling involves applying a relatively thin, broken layer of lighter or contrasting paint over an existing layer.
Some of the color underneath remains visible.
This can create a soft, textured appearance.
Try using a lightly loaded brush and dragging it gently over a dry surface.
Scumbling can be particularly effective for clouds, foliage, aged surfaces, and atmospheric landscapes.
Experiment With Stippling
Stippling involves creating an image or texture with small dots or dabs.
You can use the tip of a brush, a sponge, or another tool.
Vary the size and spacing of your marks.
Closely packed dots can create darker areas, while more widely spaced marks can create lighter ones.
Stippling can be useful for foliage, texture, decorative artwork, and pointillist-inspired paintings.
Try Sponge Painting

A household sponge or painting sponge can create interesting textures.
Dip it lightly into paint and press it onto your surface.
You can create:
Clouds
Foliage
Stone
Sea foam
Abstract textures
Background patterns
Avoid saturating the sponge with too much paint. A relatively small amount often produces a more interesting texture.
Use a Palette Knife

A palette knife isn't just for mixing paint.
You can use it to apply thick acrylic paint directly to the canvas.
Drag the knife across the surface to create bold, textured marks.
This works particularly well for:
Abstract paintings
Landscapes
Flowers
Buildings
Thick highlights
Textured backgrounds
A palette knife can create marks that look completely different from traditional brushwork.
Practice Impasto

Impasto involves applying paint thickly so that the brush or knife marks remain visible.
Acrylics can be used for impasto, especially when combined with heavy-body acrylic paint or appropriate texture mediums.
Thick paint catches the light differently from a flat surface, giving the artwork a physical quality.
Try building thick highlights on flowers, waves, clouds, or textured landscapes.
Explore Texture Mediums
Acrylic mediums allow you to change the behavior and appearance of your paint.
Depending on the product, mediums can make paint:
Thicker
More transparent
More fluid
Slower drying
More textured
More glossy
More matte
Texture gels can also help you build raised surfaces.
Experiment with mediums gradually so you can learn what each one does before incorporating it into a larger painting.
Try Painting With a Limited Palette
Using fewer colors can actually improve your painting skills.
Choose three or four colors plus white and see how many variations you can create.
A limited palette encourages you to think carefully about color relationships.
It can also make a painting feel more cohesive because the same colors appear throughout the image.
Practice Value Before Color
Value refers to how light or dark something appears.
A painting can contain beautiful colors and still look flat if the values aren't working.
Try creating a simple grayscale study before tackling a complicated painting.
Look at your reference and identify:
Light areas
Middle values
Dark areas
Once the value structure works, color becomes easier to manage.
Use Underpainting
An underpainting is an initial layer of color or value beneath the finished painting.
It can establish the overall mood and structure before you begin adding details.
For example, you might use a warm brown underpainting for a landscape and then layer greens and blues over it.
Small areas of the underpainting may remain visible, adding warmth and visual interest.
Try a Monochromatic Study

Choose one color and create an entire painting using variations of that color.
Add white to create lighter values and use darker versions for shadows.
This exercise helps you focus on:
Value
Form
Composition
Light
Shadow
It also takes some of the complexity out of color mixing.
Paint Simple Still Lifes
Still-life painting is an excellent way to practice acrylic techniques.
Set up a few ordinary objects, such as a mug, fruit, bottle, or vase.
Use a lamp or window light to create clear shadows.
Focus on observing rather than simply drawing what you think the objects should look like.
Practice With Simple Landscapes
Landscapes provide opportunities to practice many acrylic techniques at once.
You can work on:
Layering
Atmospheric perspective
Blending
Dry brushing
Texture
Color mixing
Light and shadow
Start with a simple scene rather than a highly detailed mountain range.
A field, sky, tree line, and a few foreground objects can teach you plenty.
Create Soft Backgrounds
Acrylics can create beautiful backgrounds when you keep the details simple.
Try using large brushes to establish broad areas of color.
Don't worry about making everything perfectly smooth.
A slightly varied background can sometimes create more visual interest than a completely uniform one.

*As a Amazon affiliate I earn from qualifying purchases.
Add Details Last
One common beginner mistake is focusing on small details too early.
Start with large shapes.
Establish the background and major forms.
Then gradually add smaller elements.
Save tiny details such as individual leaves, highlights, facial features, or texture marks for the end.
This helps keep the painting organized and prevents you from spending too much time on areas that may later be covered.
Use Different Brush Sizes
Large brushes encourage you to think in broad shapes.
Small brushes allow you to add details.
Try using a larger brush for as long as possible before switching to a smaller one.
This can help prevent a painting from becoming overly detailed too early.
Don't Overwork the Paint
One of the easiest mistakes with acrylics is continuing to brush an area after it has started drying.
The paint can become tacky and begin lifting or looking uneven.
If something isn't working, sometimes the best solution is to stop, let it dry, and paint another layer.
Keep Your Brushes Clean

Acrylic paint can dry quickly on brushes, and once it dries completely, it can be difficult to remove.
Rinse brushes frequently while painting.
Don't leave them sitting in water for long periods because this can damage the shape of the bristles.
At the end of your session, clean them thoroughly and reshape the tips if appropriate.
Don't Use Too Much Water
Water can make acrylic paint more fluid, but adding too much can weaken the paint film and make the application unpredictable.
If you want to significantly alter transparency, flow, or drying time, consider using an acrylic medium designed for that purpose.
Learn to Correct Mistakes
One of the best things about acrylics is that mistakes can often be painted over once the underlying layer is dry.
If you dislike an area, don't panic.
Let it dry.
Then cover it with another layer.
You may need several coats, particularly when painting a lighter color over a dark one, but that's completely normal.
Use Reference Photos Carefully
References are particularly useful when you're learning.
They can help you understand:
Proportion
Lighting
Color
Perspective
Texture
Anatomy
But don't feel obligated to reproduce every detail.
Use the reference as information rather than a set of instructions.
You can simplify, exaggerate, or rearrange elements to make the painting your own.
Practice Edges

Edges are an important but sometimes overlooked part of painting.
Some edges should be sharp and clearly defined.
Others can be soft or almost disappear into the surrounding area.
Try deliberately creating a mixture of hard and soft edges.
This can make your paintings feel more natural and three-dimensional.
Learn to Create Depth
You can create depth by changing several things as objects move farther away.
Distant objects often appear:
Lighter
Less detailed
Less saturated
Softer around the edges
Foreground objects can generally have stronger contrast and more visible texture.
This technique is particularly useful for landscapes.
Experiment With Negative Space
Negative space is the area surrounding and between your subjects.
Instead of concentrating entirely on the object you're painting, pay attention to the shapes around it.
This can help you improve composition and make your subjects more accurately proportioned.
Try Abstract Painting
You don't always have to paint recognizable subjects.
Create an abstract painting using shapes, lines, colors, textures, and movement.
Try working without a reference.
You can experiment with a palette knife, sponge, dry brush, or large brush.
Abstract work can be particularly useful for becoming more comfortable with experimentation.
Combine Techniques

You don't have to choose one acrylic technique and use it throughout an entire painting.
A single piece might include:
Flat areas of color
Glazing
Dry brushing
Palette-knife texture
Soft blending
Stippling
Fine details
Combining techniques can create contrast and keep a painting visually interesting.
Develop Your Own Brushwork
As you practice, you'll begin to notice certain brush movements that you enjoy.
Maybe you like short, choppy strokes.
Perhaps you prefer long, smooth marks.
You might enjoy thick palette-knife applications.
Maybe your style is built around small dabs of color.
Pay attention to these preferences.
They can eventually become part of your artistic style.
Try Painting the Same Subject More Than Once
Choose a simple subject and paint it several different ways.
Make one version realistic.
Make another loose and expressive.
Try a limited palette.
Use only a palette knife.
Create a highly textured version.
Then compare them.
You may discover techniques you want to incorporate into your regular work.
Keep a Practice Canvas or Sketchbook
Not every painting needs to become a finished piece.
Keep some inexpensive surfaces available for experimentation.
Test colors.
Try new brush techniques.
Practice textures.
Experiment with mediums.
Make mistakes.
This gives you a low-pressure place to learn.
Don't Compare Your First Paintings to Finished Artwork Online

It's easy to look at professional acrylic paintings online and wonder why your work doesn't look the same.
Remember that you're seeing the result of years of practice.
Instead, compare your current work to something you painted several months ago.
Look for improvements in your color mixing, brush control, composition, or confidence.
That's a much more useful comparison.
Give Yourself Small Projects
Rather than trying to create a complicated masterpiece immediately, give yourself manageable projects.
Paint a bowl of fruit.
Paint one flower.
Paint a simple sunset.
Paint a mug.
Paint a tree.
Paint a small landscape.
Each project gives you an opportunity to practice a specific technique without becoming overwhelming.
Move Beyond Beginner Techniques Gradually
Once you feel comfortable with basic layering, blending, dry brushing, and color mixing, start combining techniques.
Try glazing over textured areas.
Experiment with palette-knife work over brushed layers.
Use a limited palette for a more advanced landscape.
Try complex lighting in a portrait.
The goal isn't to collect techniques simply for the sake of knowing them.
It's to understand which techniques help you communicate what you want to say.
Find Techniques That Suit Your Style
Eventually, you may discover that you naturally prefer certain approaches.
Maybe you love bold, visible brushstrokes.
Maybe you prefer smooth, realistic blending.
Perhaps you enjoy thick texture and palette knives.
Maybe you like thin transparent layers.
There is no requirement to use every acrylic technique.
Your artistic style can grow from the techniques you enjoy most.
Keep Experimenting
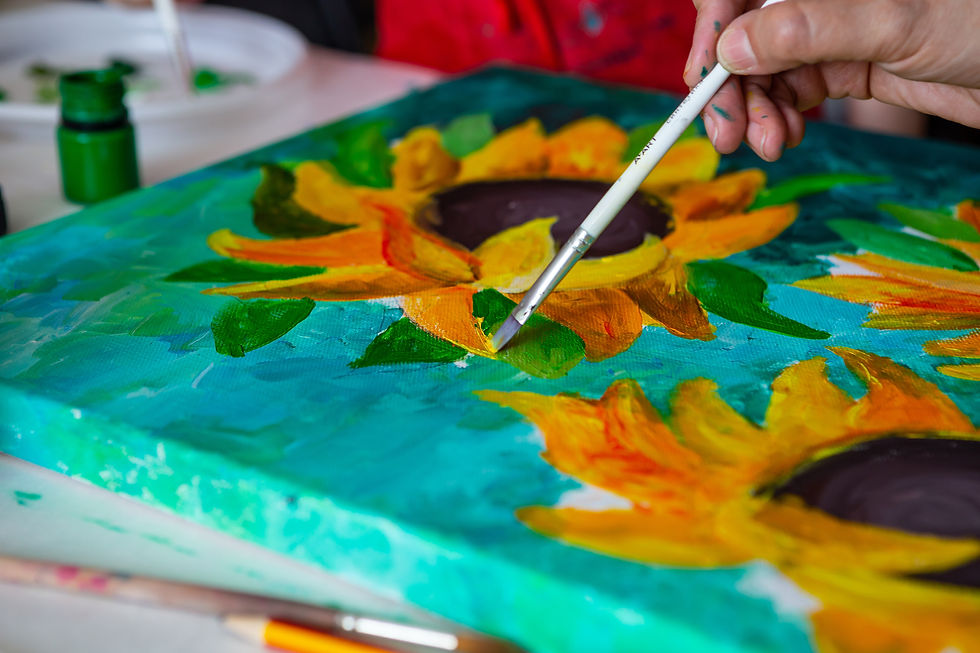
Even experienced artists continue experimenting.
Try a new brush.
Change your palette.
Paint on a different surface.
Use a different medium.
Work larger.
Work smaller.
Try a new subject.
Experimentation keeps your practice interesting and can lead to unexpected discoveries.
Don't Be Afraid to Paint Over Something
Sometimes a painting isn't working.
Instead of abandoning it immediately, let it dry and try another layer.
You can completely change the background.
Simplify an area.
Darken the shadows.
Add a new color.
Cover an unwanted object.
Acrylics give you plenty of opportunities to revise your work.
Learn When to Stop
Knowing when to stop is just as important as knowing how to add another layer.
If the painting already communicates what you want, you may not need another dozen details.
Take breaks and look at the painting from a distance.
Sometimes what feels unfinished when you're sitting inches away looks perfectly balanced from across the room.
Enjoy the Process
Acrylic painting is as much about experimentation as it is about producing a finished image.
Some paintings will turn out beautifully.
Others won't.
You'll mix colors you don't like, make awkward brushstrokes, overwork areas, and occasionally wonder what happened to the painting you thought was going so well.
That's normal.
Every painting teaches you something.
Keep Practicing

The most useful acrylic technique is arguably the simplest one: practice regularly.
You don't need to paint for hours every day.
Even twenty or thirty minutes can help you become more comfortable with your materials.
Practice mixing colors.
Try a new brushstroke.
Paint a small object.
Experiment with texture.
Work from a reference.
Over time, these small sessions add up.
Let Your Style Develop Naturally
Acrylic painting gives you enormous freedom.
You can create delicate washes, bold graphic shapes, thick textured surfaces, soft landscapes, detailed portraits, or loose abstract work.
As you experiment, you'll begin to discover which techniques feel most natural to you.
Your preferred colors, brushstrokes, textures, compositions, and methods of layering will gradually become part of your artistic identity.
You don't have to decide what your style will be ahead of time.
Keep learning the fundamentals, but give yourself plenty of room to experiment.
Keep Exploring Acrylic Painting
Acrylics are remarkably versatile, which is part of what makes them such a satisfying medium for beginners and experienced artists alike.
Start with the basics: learn how your brushes behave, practice color mixing, experiment with layering,
and become comfortable with techniques such as dry brushing, glazing, blending, and palette-knife painting.
As your confidence grows, combine techniques and experiment with different surfaces, textures, mediums, and styles.
Most importantly, don't worry about mastering everything at once.
Every painting is an opportunity to learn something new. Some techniques will become favorites, others won't suit you at all, and some may lead you toward an approach you never expected.
The more you paint, the more you'll understand your materials—and the more naturally your own artistic voice will begin to show through.
LEARN MORE:

*As an Amazon affiliate I earn from qualifying purchases.


Comments