


Learning Calligraphy and Hand Lettering

Updated: Sep 13

At first glance, calligraphy and hand lettering can look like something reserved for artists or people with “naturally good handwriting,” but most of what you’re seeing is really just practice applied consistently over time. Every letter is built from a small set of repeatable movements—light strokes, heavier strokes, curves, and spacing decisions that become more natural the more you use them.
Once you start slowing down and paying attention to how letters are formed instead of rushing through them, even simple writing begins to feel more intentional. That’s really where this skill begins: not with perfection, but with learning how to move your hand differently and noticing how much control you actually have over the shape of what you write.
Calligraphy vs. Hand Lettering: Understanding the Basics
Calligraphy is structured writing. It relies on repeatable strokes and consistent rules. Traditional styles like Copperplateor Italic calligraphy are built from specific stroke patterns—thin upstrokes and thick downstrokes created by controlled pressure and pen angle.
Hand lettering is more illustrative. Instead of writing letters in one motion, you’re essentially drawing each letter. That means you can exaggerate shapes, mix styles, or build custom compositions. A quote written in hand lettering might look playful or bold, while calligraphy tends to feel more formal and flowing.
Most beginners end up learning both because the foundational skills—spacing, rhythm, and proportion—carry over between them.
Tools That Actually Matter (and What to Start With)
You don’t need a large kit to begin, but the right starting tools make a big difference in how quickly you improve.
A good entry point is a brush pen, because it naturally creates thick and thin lines based on pressure. Popular beginner-friendly options include Tombow Fudenosuke (hard or soft tip) and Tombow Dual Brush Pens. These help you understand pressure control without needing ink or nibs.
For traditional pointed pen calligraphy, you’ll eventually want:
A dip nib holder
Flexible nibs (like Nikko G, Zebra G, or Hunt 22)
Calligraphy ink (such as India ink or sumi ink)
Smooth paper (Rhodia, Bristol board, or marker paper)
Paper matters more than most beginners expect. Rough or absorbent paper causes ink to bleed and makes control harder. Smooth, slightly coated paper gives cleaner strokes and better feedback.
You’ll also want:
A pencil for guidelines
A ruler for baselines and height lines
Optional: light box or printable practice sheets
The Core Skill: Pressure, Angle, and Stroke Direction

Almost everything in calligraphy comes down to three things: pressure, angle, and direction.
Pressure control is what creates contrast. Downstrokes are made with more pressure to create thicker lines, while upstrokes use very light pressure to stay thin. If your downstrokes aren’t getting thick enough, it usually means your pressure isn’t consistent yet.
Pen angle affects style. For example:
Copperplate calligraphy typically uses a 45–55° pen angle
Italic styles often use a slightly more upright angle
Keeping a consistent angle is more important than speed.
Stroke direction matters because most letterforms are built from predictable patterns:
Upstroke (light) → thin lines
Downstroke (heavy) → thick lines
Oval shapes (like “o” or “a”) require smooth transitions between both
A good early exercise is filling a page with:
Straight downstrokes
Upstrokes
Ovals
Overlapping loops
It may feel repetitive, but this is where muscle memory develops.
Learning Letterforms the Right Way
Instead of jumping straight into full words, most structured calligraphy practice starts with basic letter families.
For example:
The letter “i” and “l” are part of simple straight-stroke families
“o,” “a,” and “d” belong to oval-based families
“m,” “n,” and “h” build from repeating arches
Practicing by family helps you see patterns instead of memorizing shapes individually.
A useful progression is:
Basic strokes (drills)
Lowercase alphabet
Uppercase alphabet
Words with repeated letters (like “minimum” or “hello”)
Full phrases
Spacing is just as important as letter shape. Beginners often crowd letters too closely. A simple trick is to imagine each letter sitting inside a “box” with equal spacing on all sides.
Hand Lettering: Building Letters Instead of Writing Them

Hand lettering feels different because you’re constructing each letter like a design.
A common method is the skeleton + outline approach:
Lightly sketch the basic letter shape in pencil
Add thickness to downstrokes
Refine curves and edges
Ink over final lines
Erase guidelines
This lets you experiment with style before committing to ink.
You can also try:
Bounce lettering (where letters sit on different baselines for a playful look)
Serif vs. sans-serif styles
Shadow lettering (adding depth by offsetting outlines)
Blended brush lettering using water brush pens
Common Beginner Challenges
One of the most common issues is shaky downstrokes. This usually happens when you move too fast. The fix is slowing down and focusing on controlled, deliberate pressure instead of speed.
Another issue is inconsistent slant. If letters lean differently across a word, the whole piece feels uneven. You can solve this by lightly drawing slant guidelines at the start of each practice page.
Ink bleeding or blotting is also common with dip pens. This usually comes down to:
Using paper that is too absorbent
Too much ink loaded onto the nib
Not wiping the nib regularly
Cleaning your nib every few minutes improves consistency more than most people expect.
Finally, many beginners struggle with fatigue in the hand. This is normal early on. It improves with shorter practice sessions (10–20 minutes) rather than long, tiring sessions.
Resources, Classes, and Where to Learn
There are a lot of strong learning options depending on how you prefer to study.
Online Classes and Courses
Skillshare – One of the most popular platforms for calligraphy and lettering classes (search for beginners Copperplate or brush lettering foundations)
Domestika – High-quality structured courses, especially for modern lettering and design-focused calligraphy
Udemy – More budget-friendly, with beginner-to-advanced calligraphy courses
Free Learning Resources
YouTube channels like:
The Postman’s Knock (excellent structured tutorials)
Joy Lauren
Amanda Rach Lee (for lettering inspiration and journaling integration)
Printable worksheets from calligraphy blogs (great for repetition practice)
Books Worth Exploring
Mastering Copperplate Calligraphy – Eleanor Winters
Modern Calligraphy – Molly Suber Thorpe
The Calligrapher’s Bible – David Harri
Books are especially helpful for understanding stroke order and letter structure in a more methodical way.
Practicing in a Way That Actually Builds Skill
The most effective practice isn’t random repetition—it’s structured repetition.
A simple weekly approach might look like:
3–4 short sessions (10–20 minutes each)
One focus per session (pressure, spacing, or a specific letter set)
One “free practice” session where you just write words or quotes
Many beginners improve faster when they alternate between technical drills and creative writing. Drills build control, while creative writing builds flow.

Calligraphy and hand lettering take time to settle into your hands. At first, it’s very deliberate—almost mechanical. But with repetition, the movements start to feel less forced and more natural. Pressure becomes easier to control, letters become more consistent, and you start noticing small details like spacing and rhythm without having to think about them as much.
What keeps people coming back isn’t just the finished work, but the process itself—the slow, focused motion of shaping each letter and watching something ordinary turn into something designed. Over time, it becomes less about trying to make perfect writing and more about developing a style that feels like your own.
LEARN MORE:
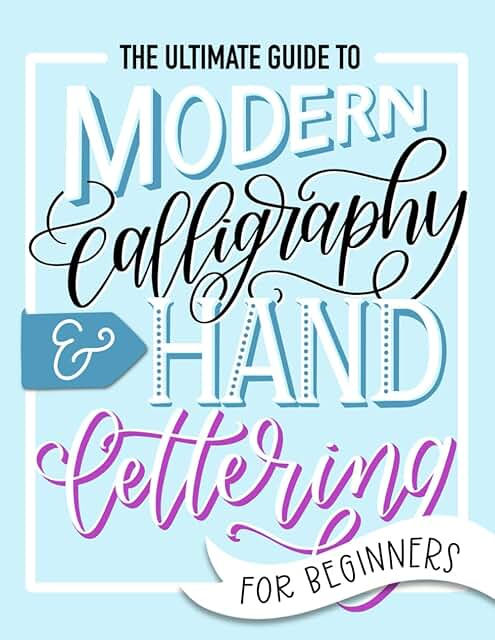
*As an Amazon affiliate I earn from qualifying purchases.


Comments